Everyone on Windows installs a application.Most applications are installed using the .exe file using which the files get installed to the required folders.But if you are you a developer, then you might want to present your application as a installer which would compress all the files into a single installer which makes it easy to present and also for the end user to install and use the software.
Individual developers need to package their softwares so that it easier to and submit it to online sites.Bytessence Install Maker (BIM) is a setup file creator for the Windows Platform. It allows packing together all the required files into a installer file ie., it can generate a single .exe file that will carry your files in a compressed form.It also create an uninstaller, so that the end user can easily remove the files installed by your application from the Add/Remove Programs in the Windows Control Panel.It uses the ZIP algorithm for a good compression ratio, compatibility and high speed.
Also Read –
- How To Extract Multiple Zip, RAR and Archive Files At Once Using ExtractNow
- How To Repair Corrupt, Damaged ZIP Files
How To Create Your Installer Using BIM –
Install and Open Bytessence Install Maker (BIM), Press “New”, which will create a new project.Next you shall find 3 Menu’s to the left side General, Installer and Uninstall.
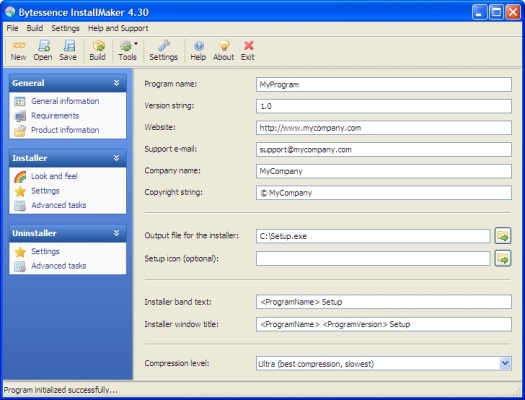
Under General Information –
- Enter all the details about the program like Name, Developer’s Name, Website, Output Folder, Program icon, Compression Level etc.
- Requirements – Check for compatible OS, .net framework compatible and warning to close any opened program windows.
- Product Information – Set the installation path of the program and Shortcut creation.
Installer Menu –
- Configure the look and feel of the program by configuring the images for the header, text color, License Information and Information about the program.Installer languages can also be selected.
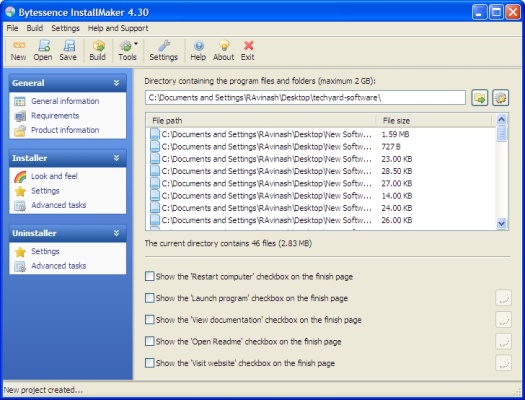
- Settings – Select the folder containing your program files.You can also set what the installer has to do after completing the installation, for ex. Restart, Open Program etc.
- Adavanced Settings – Lets users add any Registry entries, create shortcuts, associate extensions etc.
Uninstaller Menu – Configure the uninstaller so that user can find the program in the Add/Remove Program section in Windows to uninstall the programs.
Checkout FCleaner – Portable Cleaning and Optimization Tool For Windows
After configuring all the settings press “Build( F5)”.
Here’s how the final installer would look like –
Features :
- The installer can be well customized to suite your needs like adding background images, colors, background window, executable icon.
- Advanced task management (create shortcuts, registry access, component registration, modify configuration files, etc.)
- Fully automated uninstaller, no configuration needed (it can also execute user-defined actions for additional un-installation control)
- If your application needs .Net Installed on the host machine, the installer can also check the operating system version and .NET framework version installed.
- It can auto run programs/commands, add/Delete registry keys and values, create shortcuts and internet links ,copy, move and delete files, create and remove custom folders, associate/Disassociate extensions with programs, install, remove, start and stop NT Services, register/Unregister Dll/Activex, download files from HTTP servers, kill running tasks
- Customizable installer user interface, splash screens, executable icon and text color
- Optional Standard text and Rich text support for License and Readme files
- Computer restart capability for installer/uninstaller
BIM is compatible with Windows OS.


